
Set up DiceX Connect, step by step
A short tour of every screen in the plugin, in the order you will use them. Each step shows the real screen, so you know what to look for.
Install and open the plugin
Everything starts with a DiceX account and an API key. The plugin itself is free.
- In your WordPress dashboard, go to Plugins → Add New, search for “DiceX Connect”, then install and activate it.
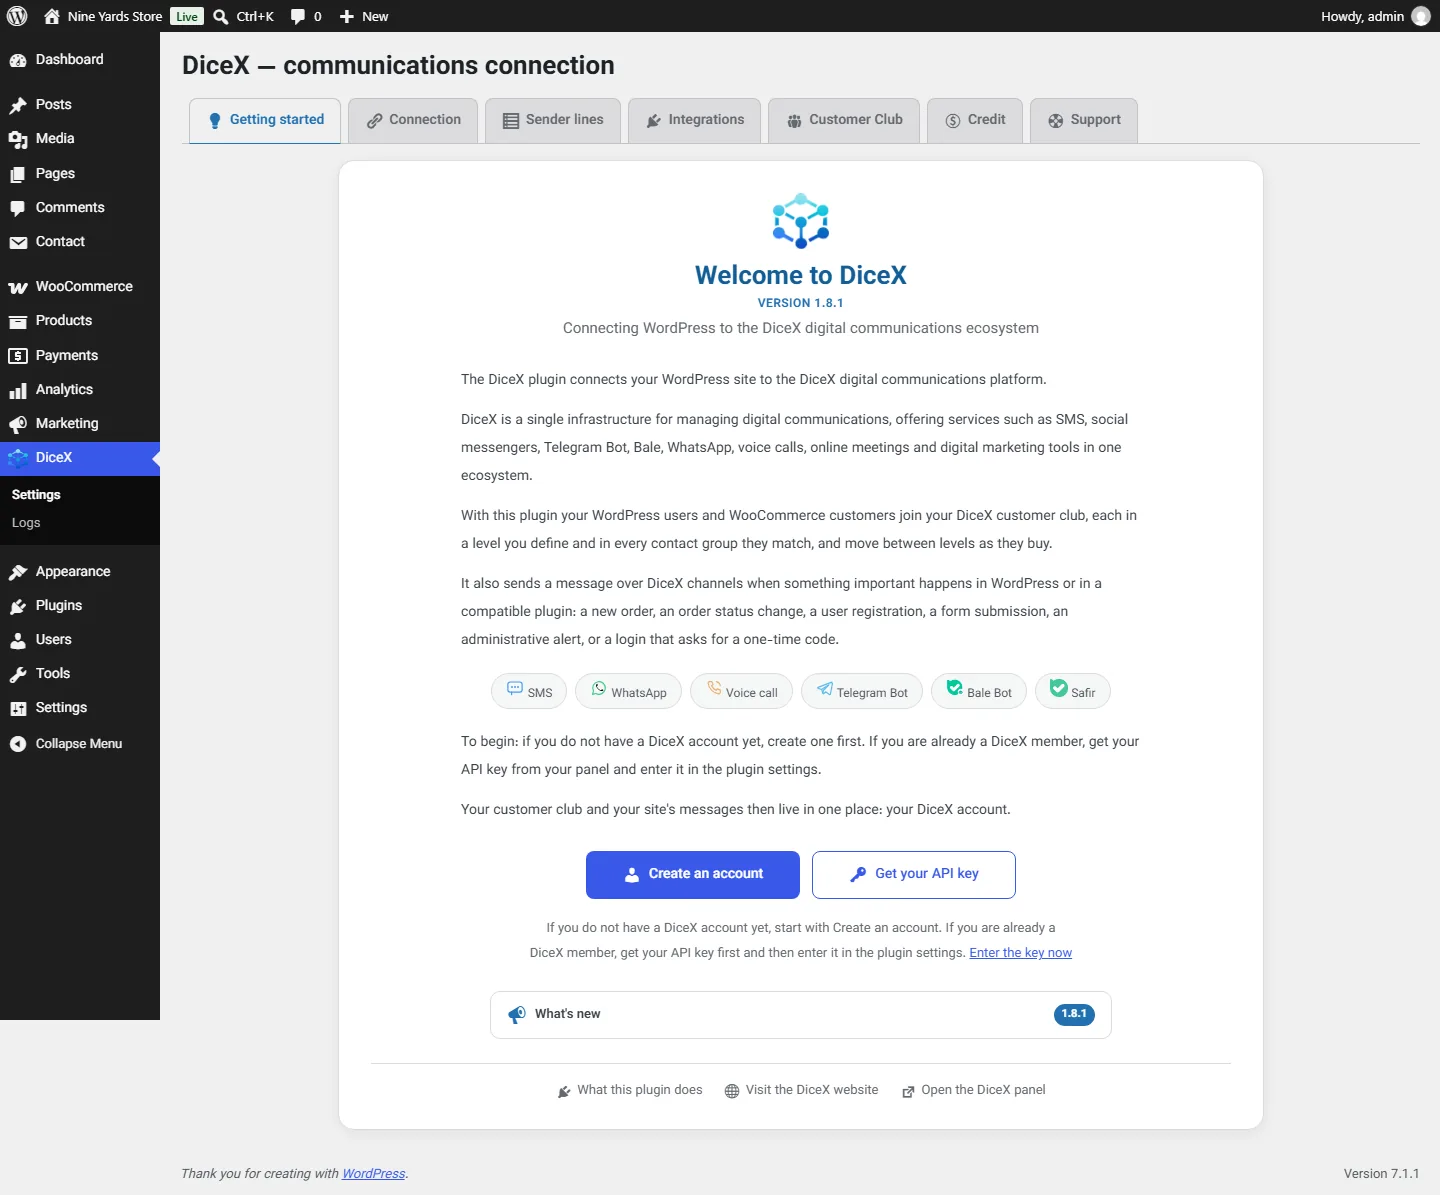
- A DiceX menu appears in the sidebar. It opens on the Getting started tab, which explains what the plugin does.
- No DiceX account yet? Choose Create an account. Already a member? Choose Get your API key and copy the key from your DiceX panel.
Good to know: Nothing leaves your site until you enter an API key.
Connection: your key and your region
One tab tells the plugin who you are and where you operate.
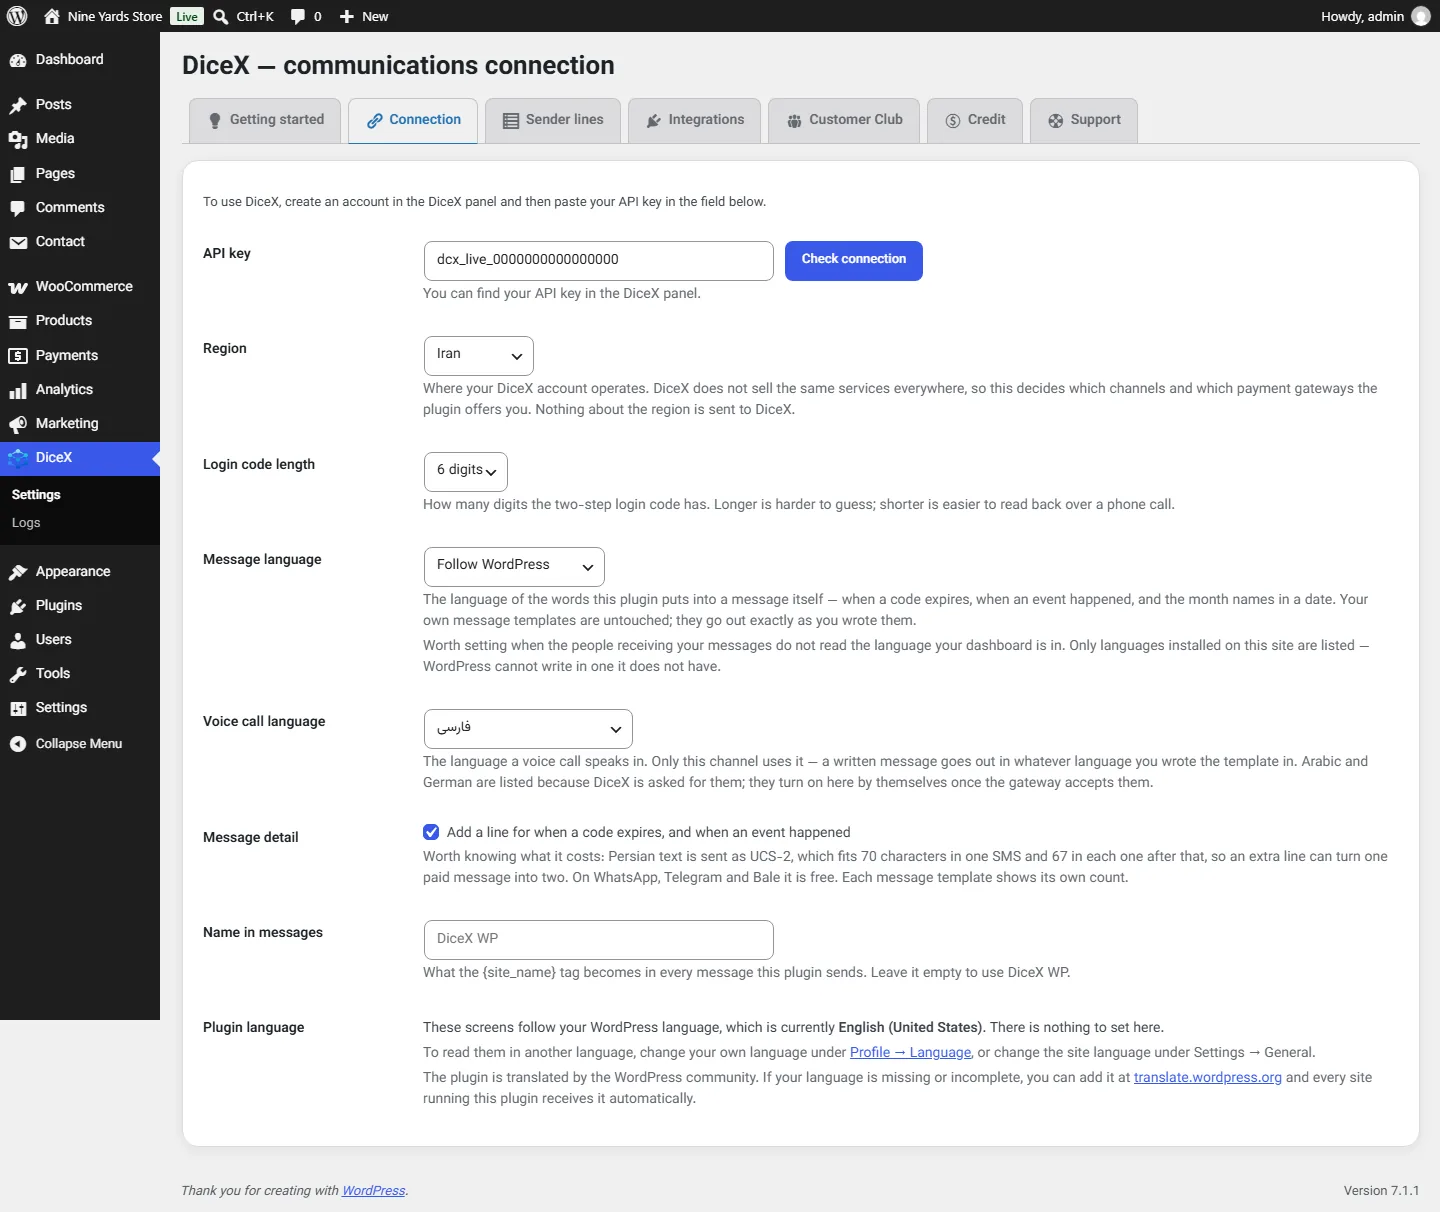
- Paste the API key and press Check connection.
- Choose your region: Iran, GCC or World Wide. It decides which channels and payment gateways the plugin offers. Nothing about the region is sent to DiceX.
- If you will use two-step login, set the code length: 4 to 8 digits, 6 by default.
- Optional: the message language, the voice call language, a line saying when a code expires and when an event happened, and the name that replaces
{site_name}in your messages.
Good to know: On a Persian SMS, the extra line can turn one paid message into two. On WhatsApp, Telegram and Bale it costs nothing.
Sender lines: which line sends
Each channel sends from a line on your DiceX account.
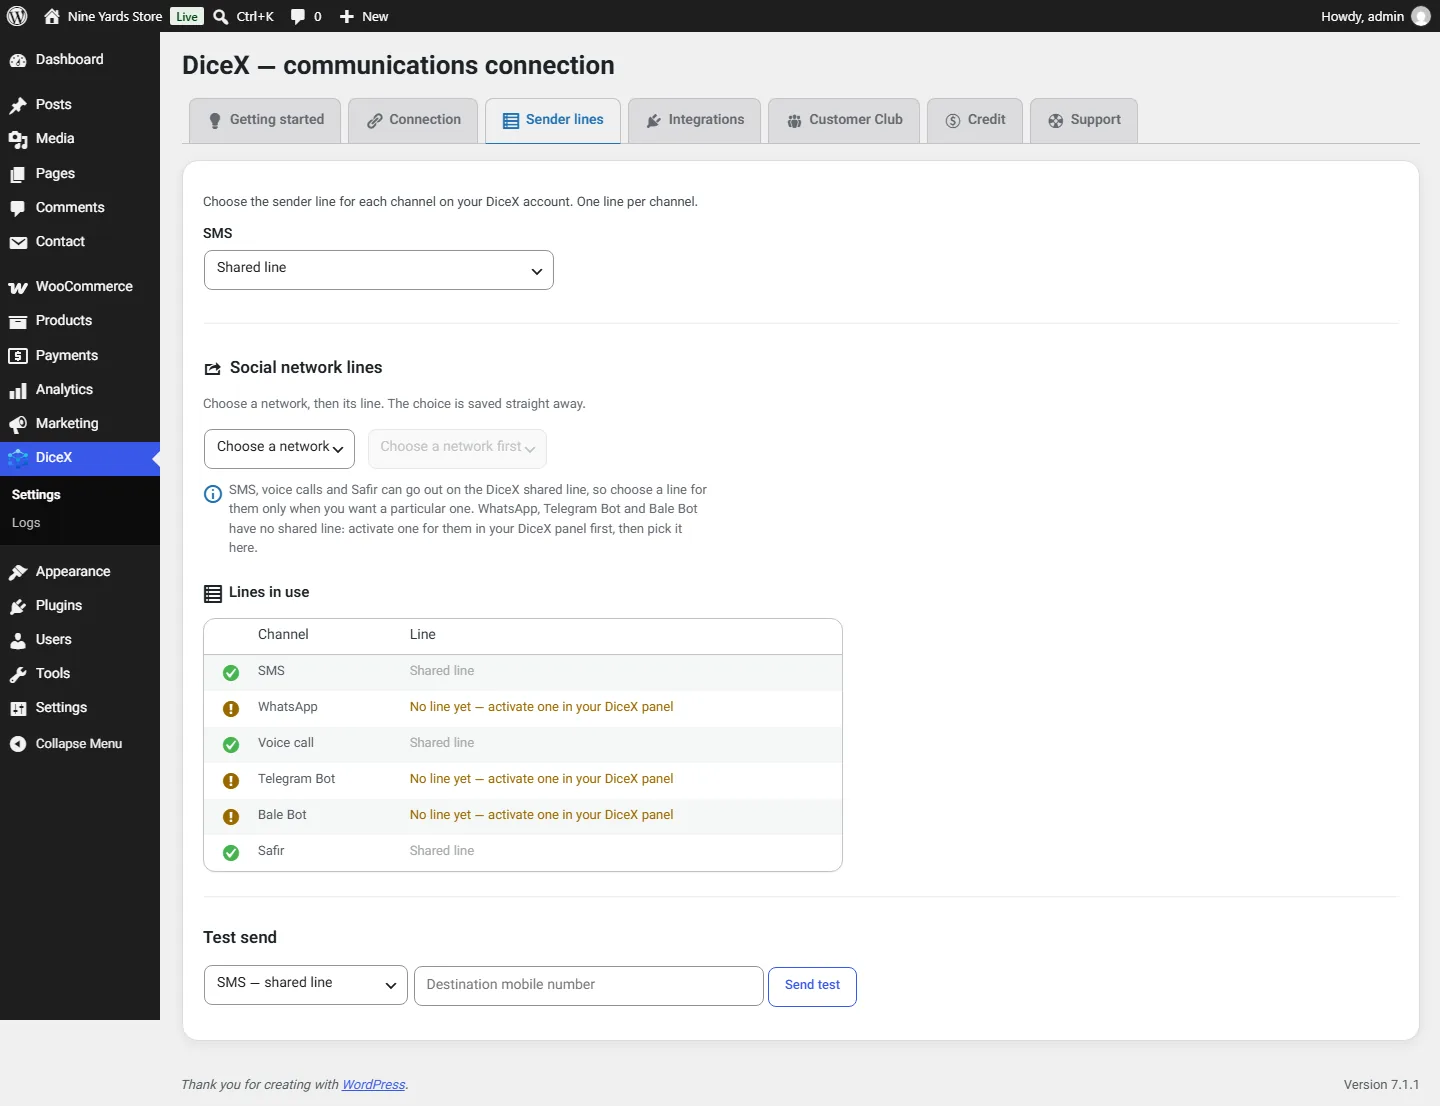
- Open Sender lines. SMS, voice calls and Safir can go out on the DiceX shared line, so pick a line for them only if you want a particular one.
- WhatsApp, Telegram Bot and Bale Bot have no shared line. Activate a line for each in your DiceX panel first, then choose it here.
- Lines in use shows which channels are ready to send. Enter a mobile number and send a test message to check.
Good to know: Which channels you see depends on the region you chose on the Connection tab.
Integrations: what sends a message
Each plugin DiceX can listen to has a card. Switch on the ones you need.
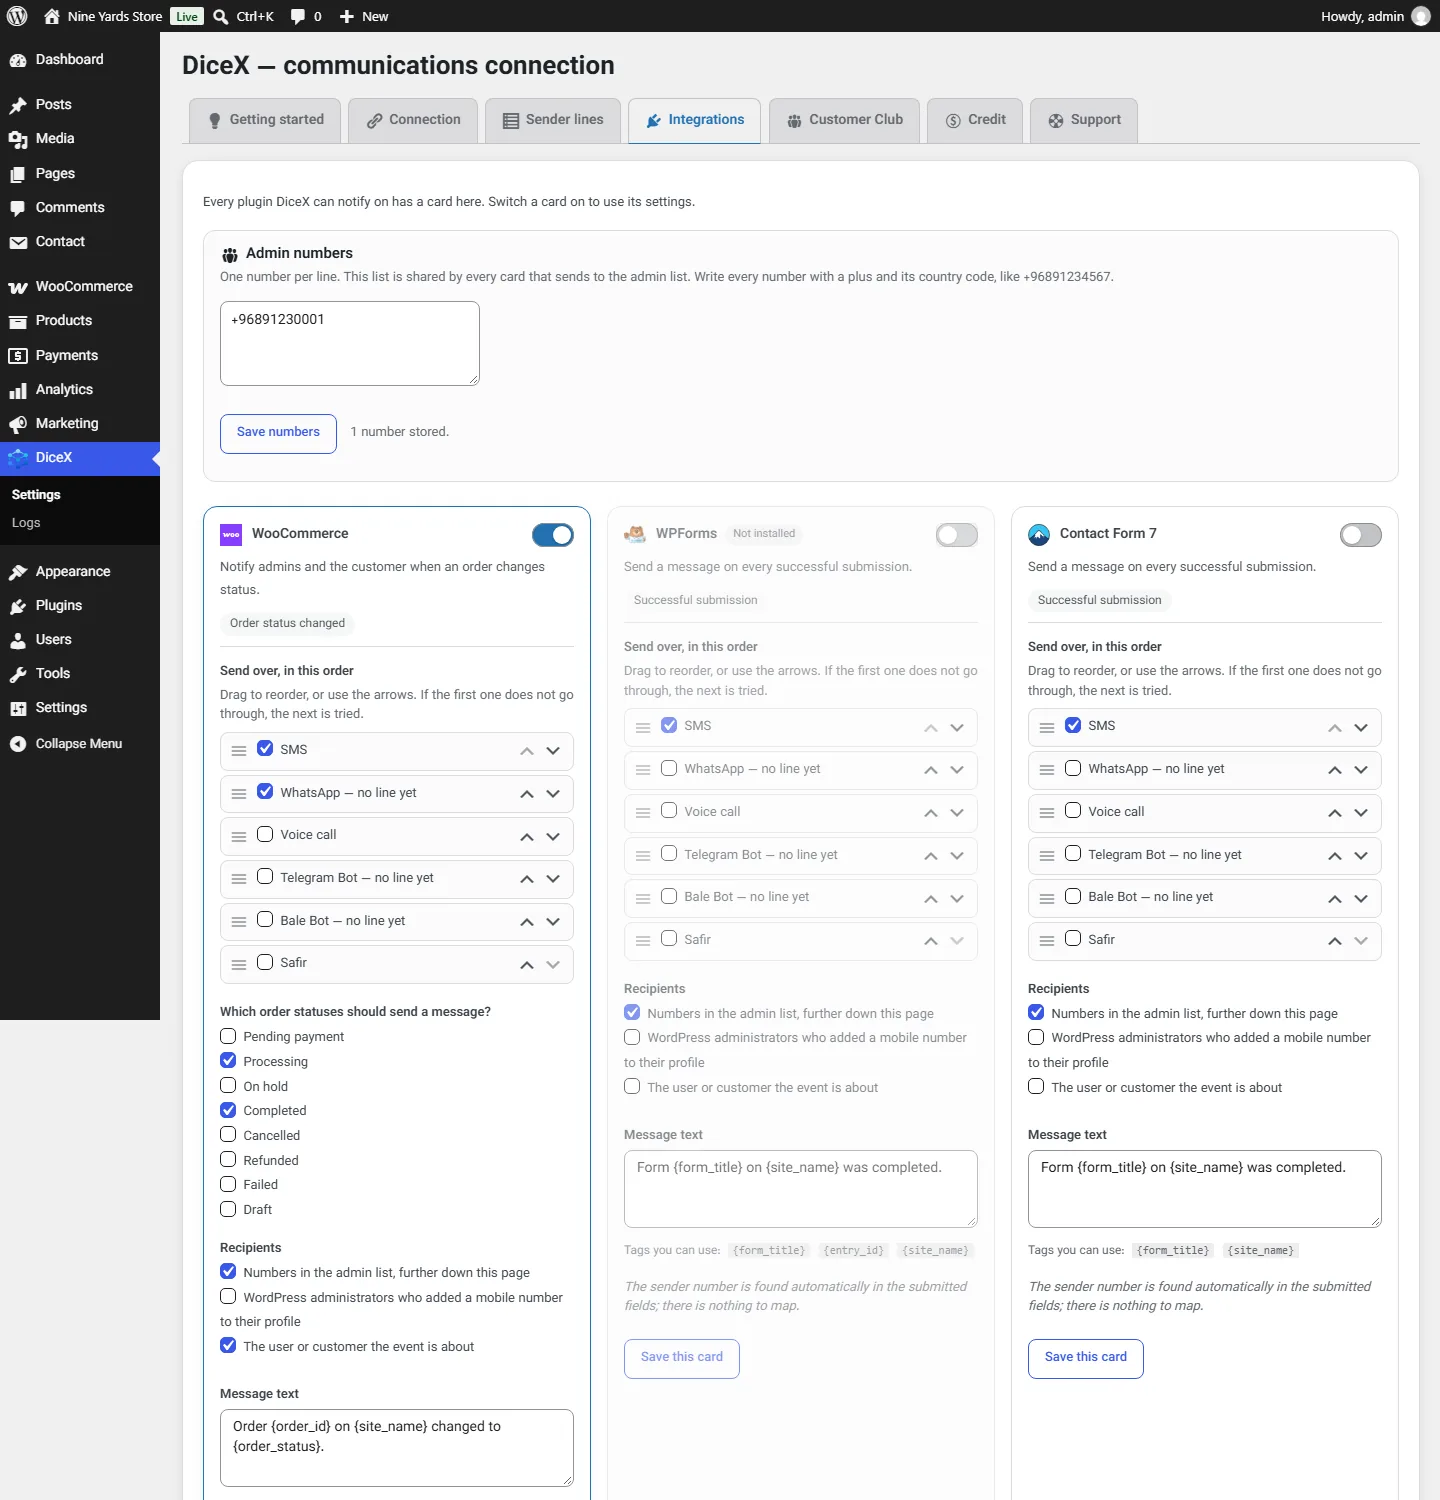
- Open Integrations. A card whose plugin is not installed is greyed out.
- First add your own mobile number, with its country code, to your WordPress profile under Users → Profile. Until then the cards stay locked; pressing one explains why and offers Open your profile.
- Type your admin numbers once, one per line, and press Save numbers. Every card that sends to the admin list uses them.
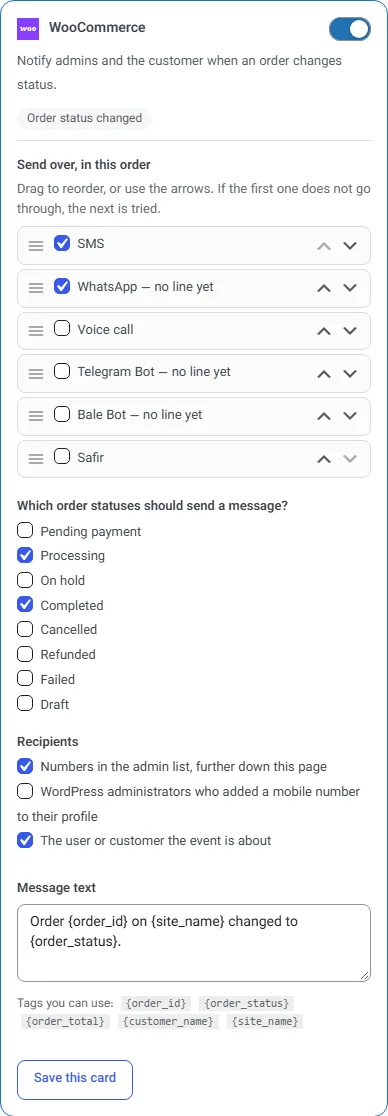
- Switch a card on. Drag the channels into the order to try them: if the first does not get through, the next one is tried.
- Choose who is told: the admin list, WordPress administrators with a mobile number in their profile, the customer or the person who filled in the form, or any mix.
- Write the message with the tags listed under the field, such as
{order_id}or{customer_name}, then press Save this card. - Forms need no mapping: for WPForms, Contact Form 7 and Gravity Forms the plugin finds the mobile number among the submitted values. For Digits, also choose DiceX as the SMS gateway in Digits' own settings.
Good to know: Cards only listen. They change nothing in the other plugins, and a failed send never breaks an order or a form.
Two-step login
Protect the WordPress login screen with a one-time code.
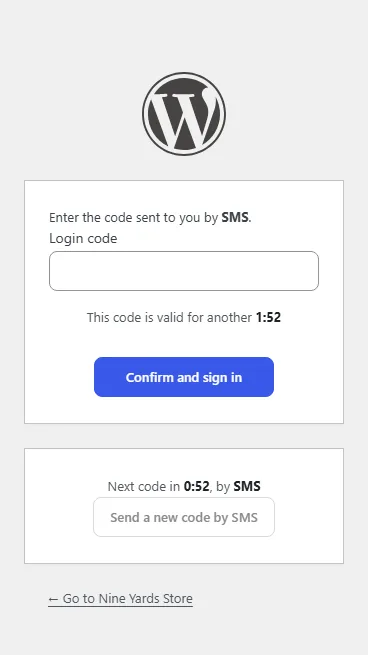
- On the Integrations tab, switch on the DiceX two-step login card and pick a mode: a code after the password, passwordless sign-in with a mobile number, or both.
- The code goes to the mobile number in each user's WordPress profile. A user with no number there signs in with the password alone.
- The login screen says which channel the code went to, with a countdown. A resend moves to the next channel in your order.
- A code lasts 120 seconds. Five wrong tries end the attempt, and a code can be sent again three times, a minute apart.
Good to know: Locked out? Add define( 'DICEX_CONNECT_DISABLE_LOGIN_OTP', true ); to wp-config.php and the two-step login stands down until you remove it.
Customer Club
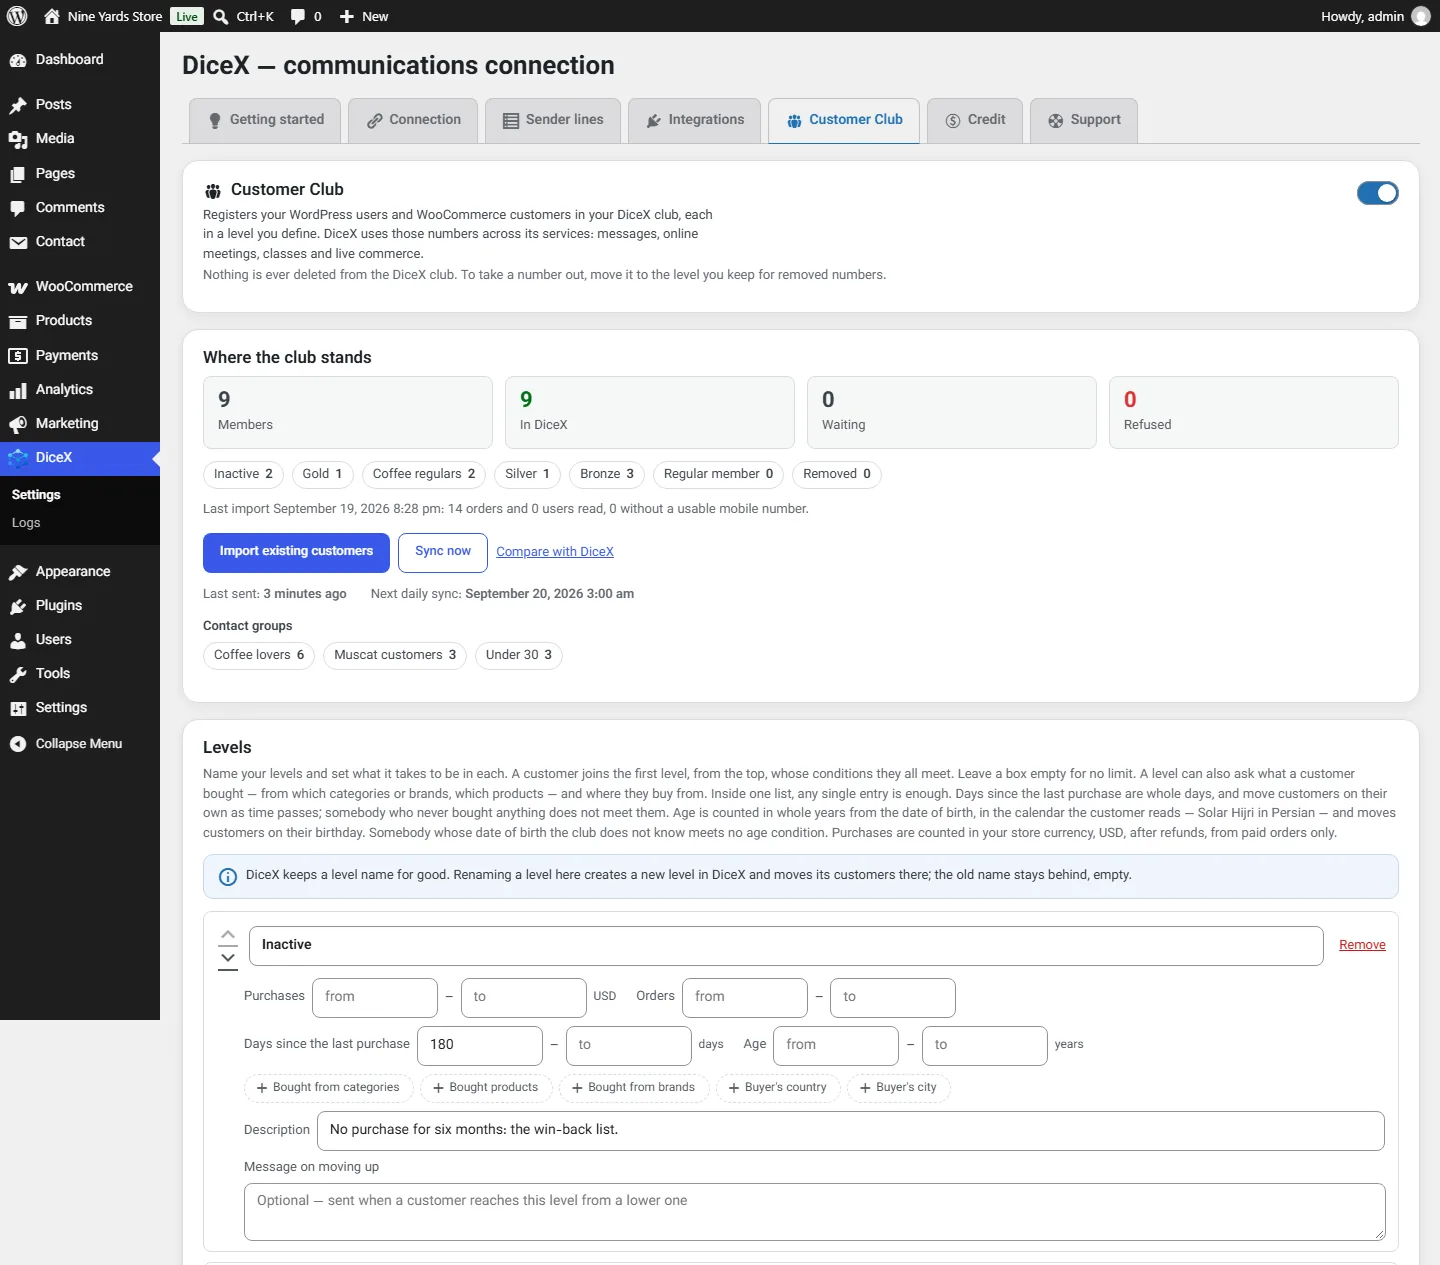
Keep your WordPress users and WooCommerce customers in your DiceX club, sorted into levels you define.
- Open Customer Club and switch it on. First choose who joins: every customer, or only those who tick the box to agree.
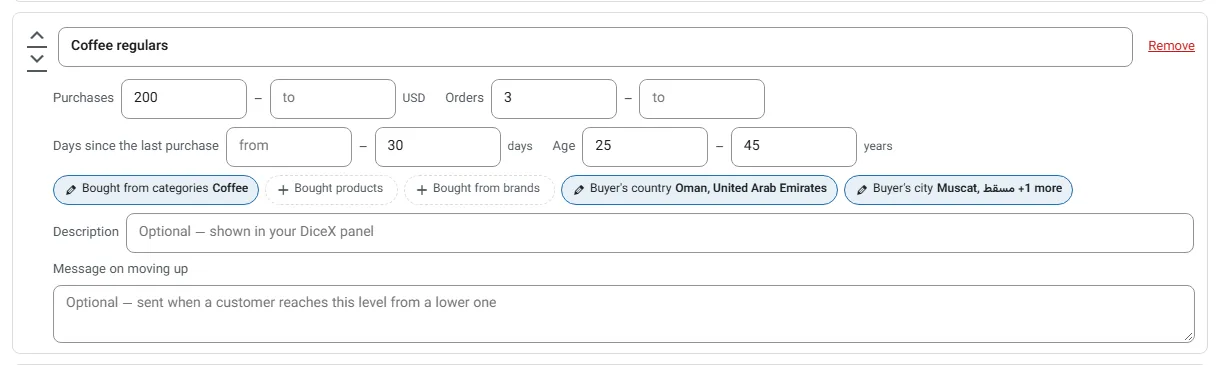
- Define your levels, with any names, in any order. Each customer sits in the first level, from the top, whose conditions they all meet.
- Give each level its conditions: amount spent, number of orders, days since the last purchase, age, product category, product, brand, country or city. Count customers shows how many match before you save.
- Add contact groups beside the levels if you want them. A customer is in every group they match, up to 20 groups.
- Optional: a welcome message for new members and a message when someone moves up a level, in each language your site uses.
- Choose how syncing runs: as things happen, once a day at a time you choose, or both. Then press Import existing customers. Nothing is sent until you have seen the counts and approved them.
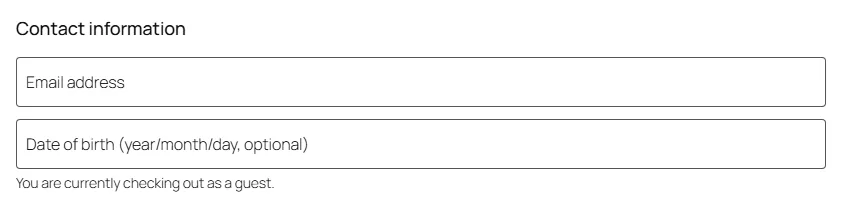
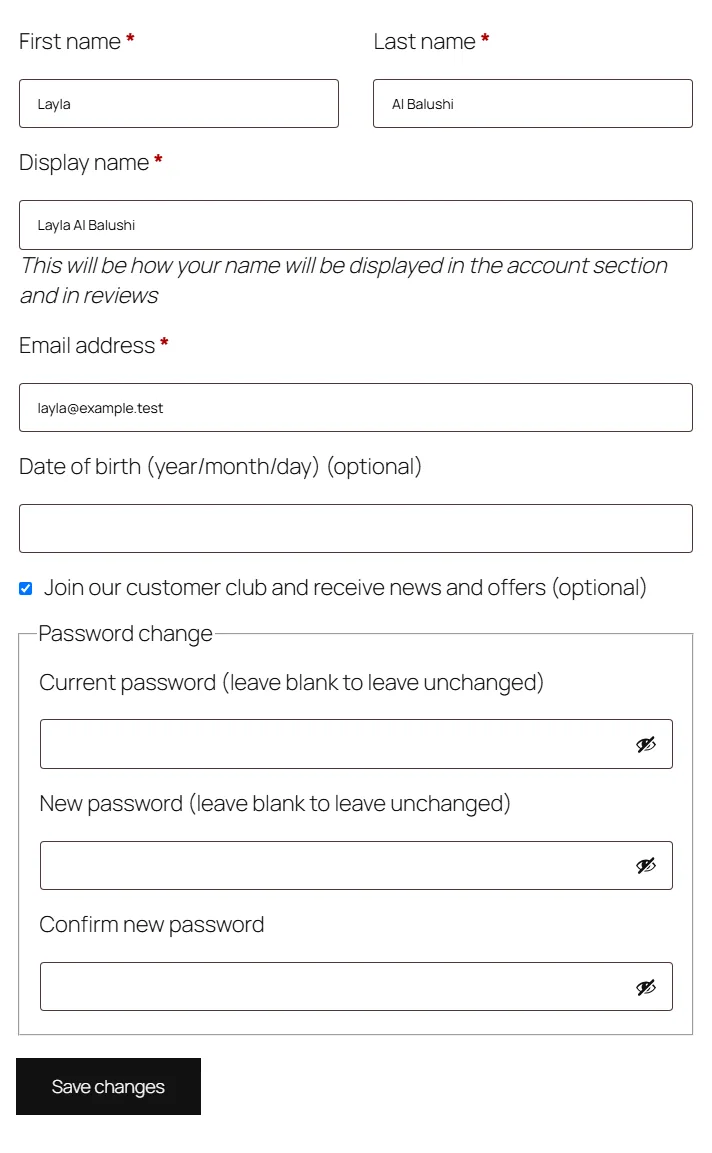
- The date-of-birth field appears at checkout, on registration and in the account, in the Solar Hijri or Gregorian calendar. Customers can leave the club from their own account at any time.
Good to know: Nothing is deleted from DiceX: a customer who leaves moves to your removed-numbers level. Birthday greetings are sent by the DiceX panel, not by the plugin.
Credit: balance and top-up
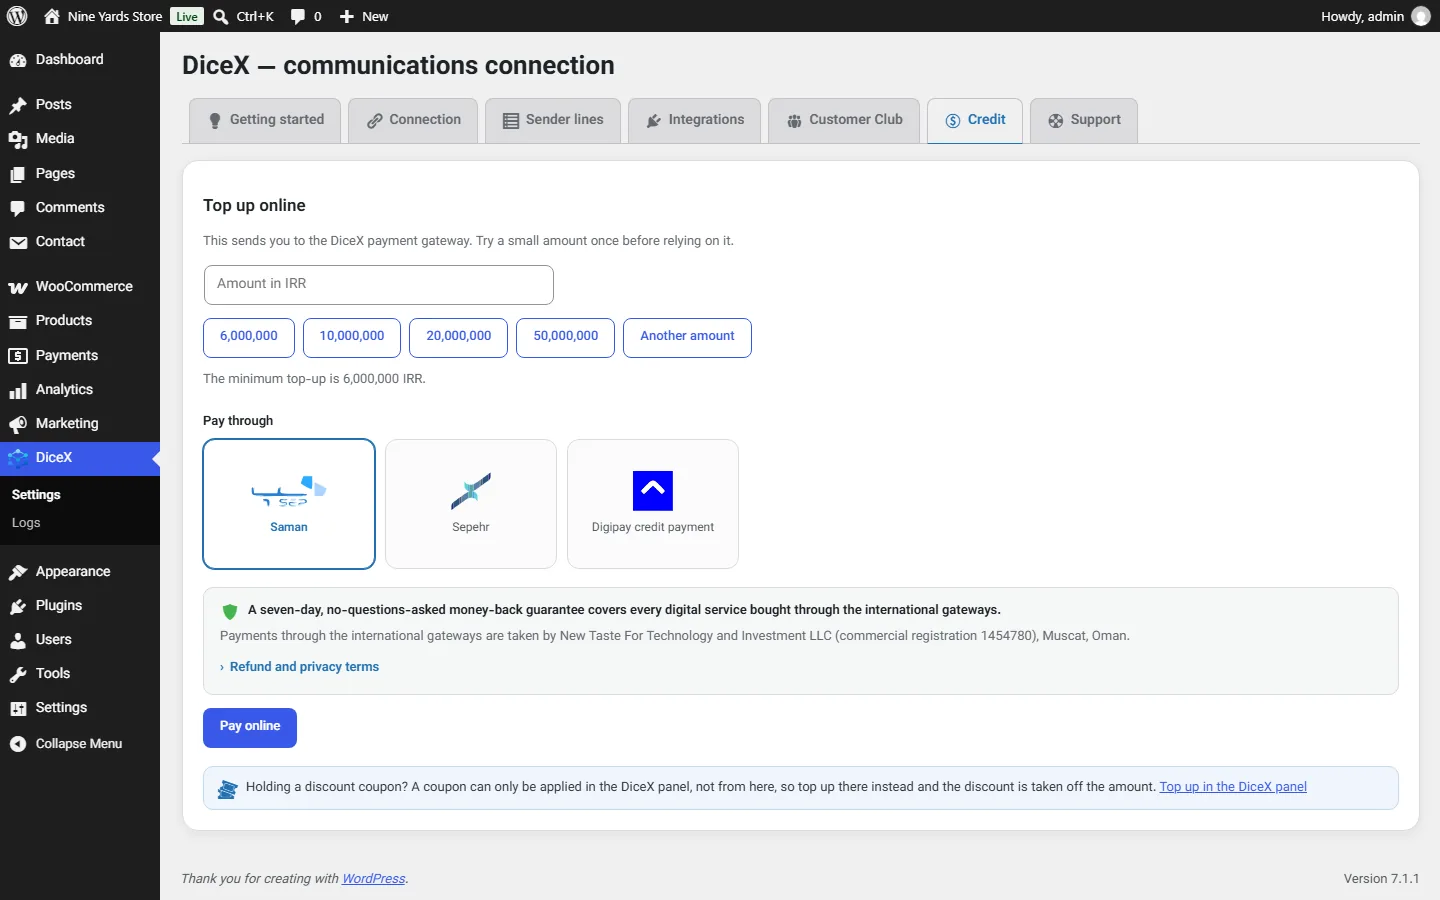
See what your DiceX account has left and top it up without leaving WordPress.
- Open Credit to see your balance.
- Pick an amount or type your own, choose one of the gateways offered for your region, and press Pay online. In Iran these are Saman, Sepehr and Digipay.
- Holding a discount coupon? Coupons are applied in the DiceX panel, so top up there instead.
Good to know: Try a small amount once before relying on it.
Logs and support
See what happened, and ask DiceX for help from inside WordPress.
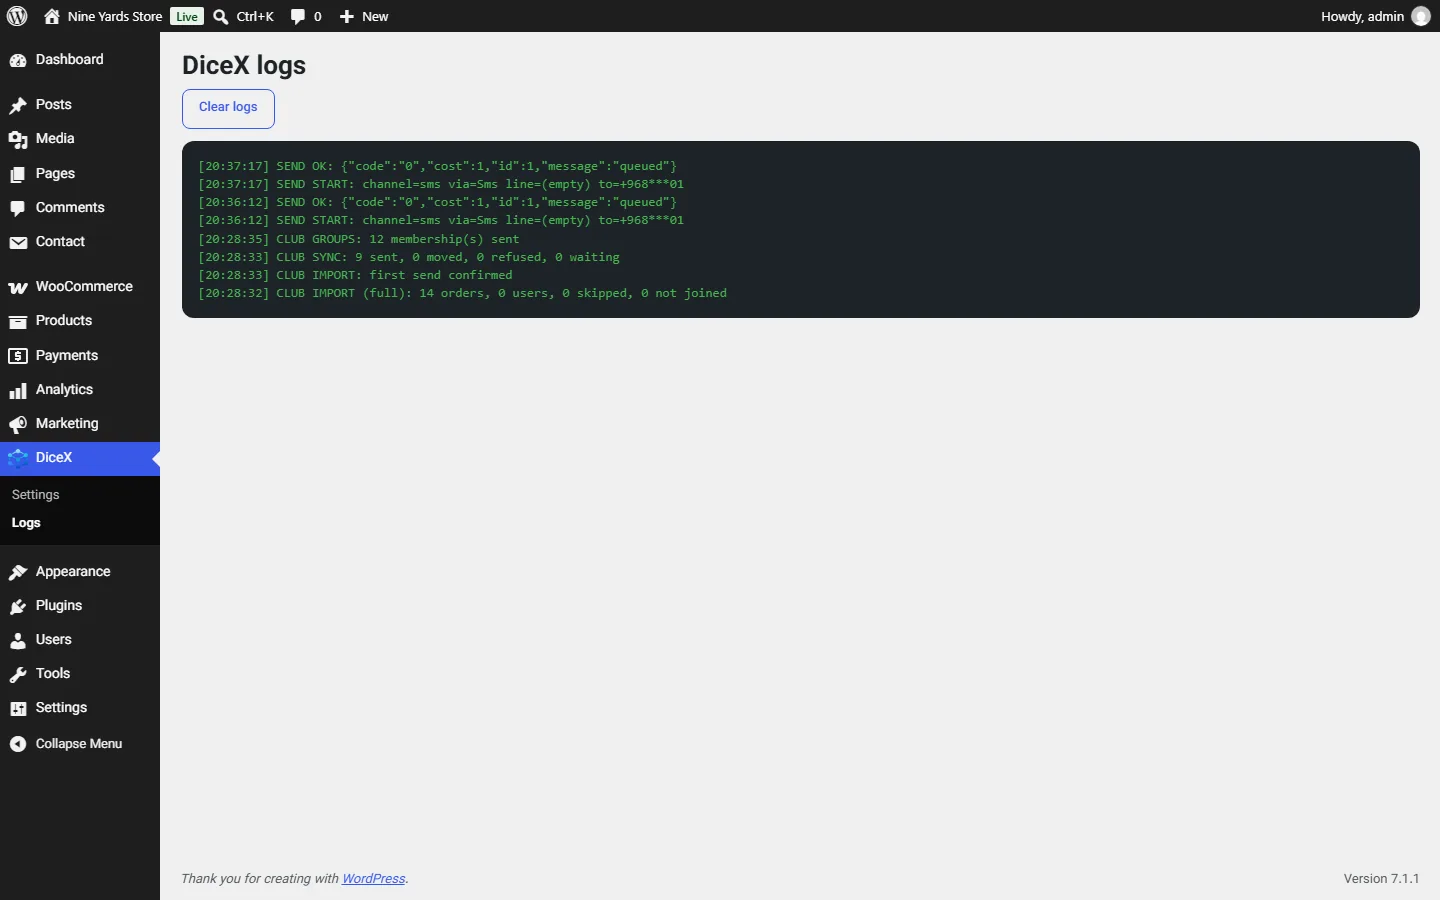
- Open DiceX → Logs to see the latest events: messages sent, errors and sign-in attempts, with numbers partly hidden.
- Still stuck? Open the Support tab and write your email, a subject and what happened. It goes to DiceX support through your site's own mail.
- The plugin log is attached unless you untick it, with email and IP addresses shortened. Your API key is never sent. The answer comes to the email you gave.
Good to know: A site can send one support message a minute and five a day.
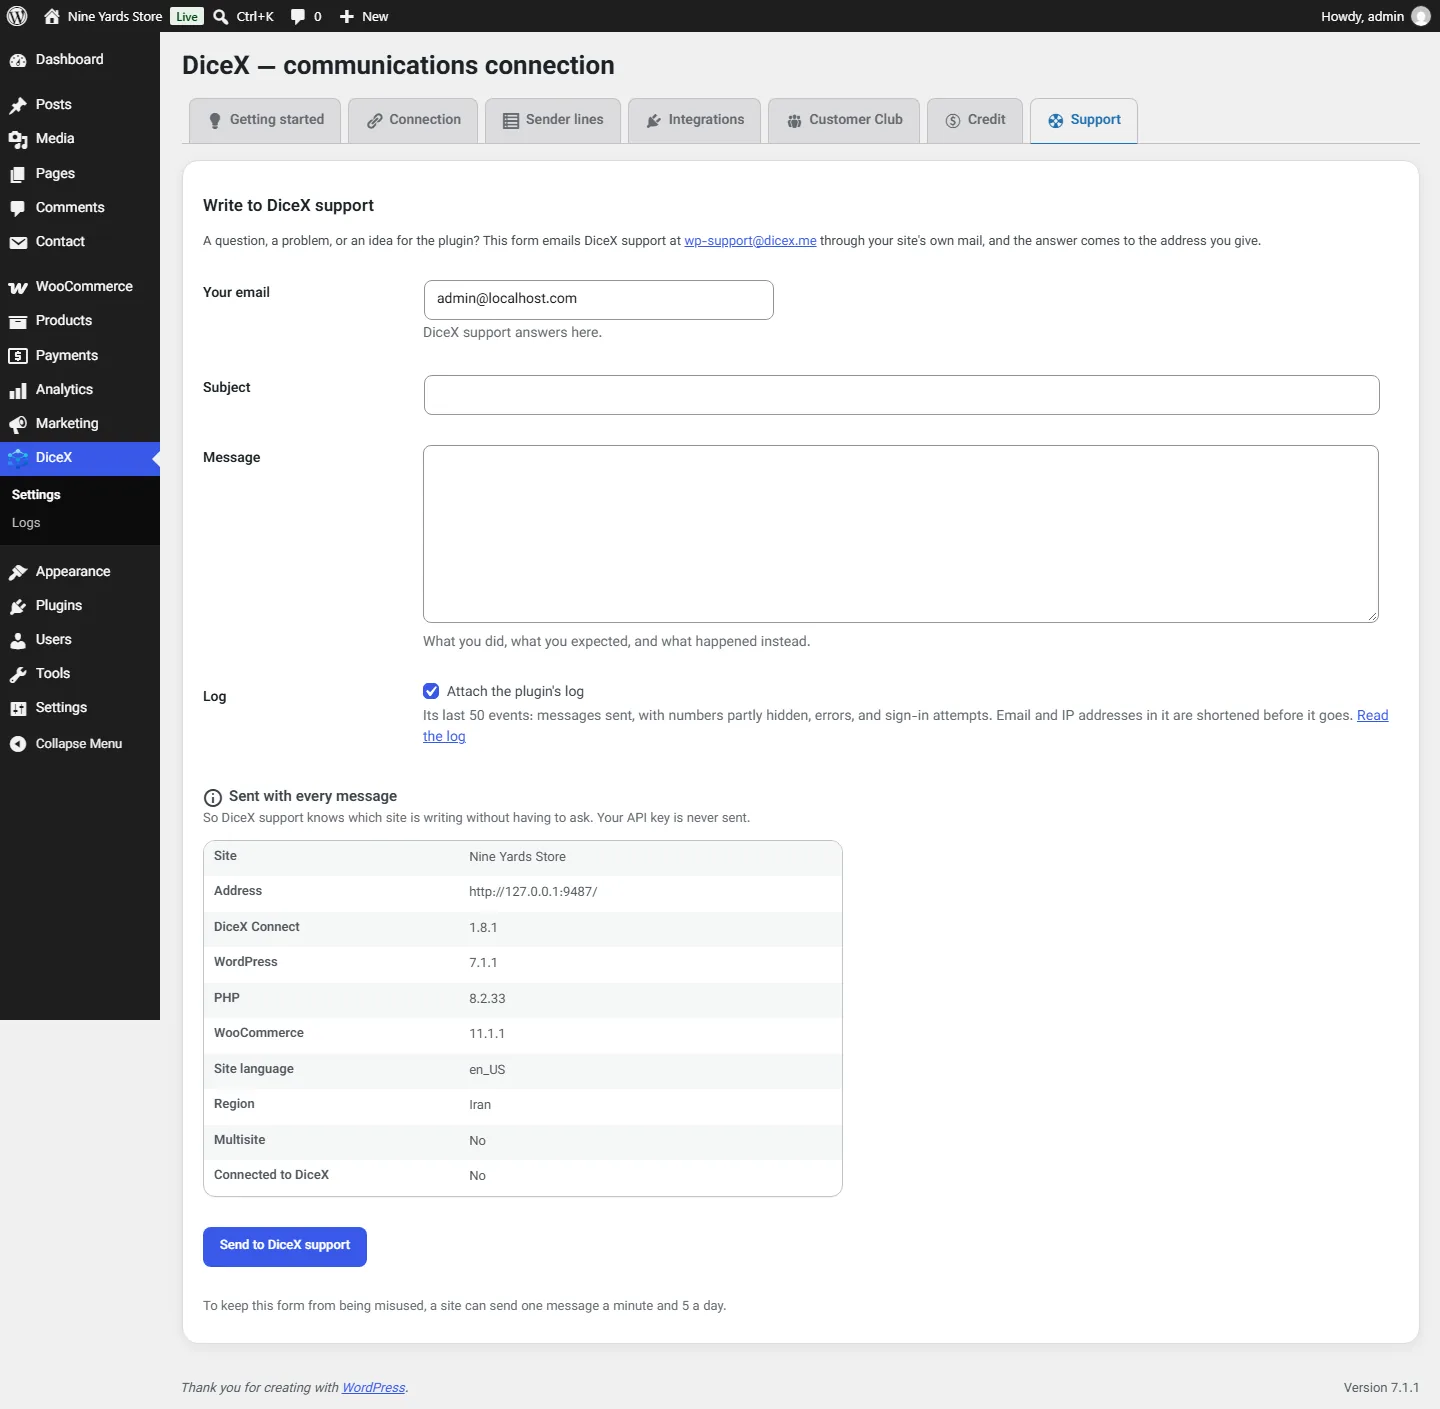
Screens from DiceX Connect 1.8.1 on a demonstration store. Names, numbers and balances are examples.